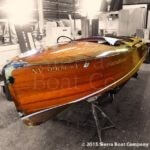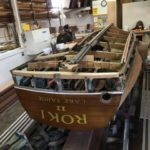
Roki II
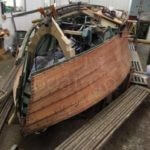
In November of 2015 we began a very involved project of restoring the bottom on 1940’ 20’ GarWood, Roki II. Roki was involved in a slight mishap when it was banged into by another boat in 2014, in the midst of the repair from the incident it was noticed that there was some soft rotten wood included in the oak stem. The owners used the boat for the subsequent summer, upon that summers end we further inspected the frame work and bottom of Roki II, it was found that much of the bottom and its framework was falling victim to wood rot.
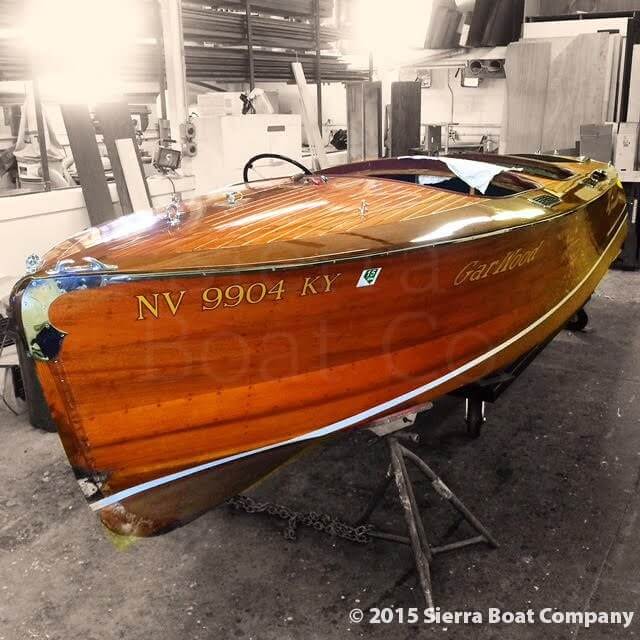
Roki II Is a GarWood 19’ Deluxe Runabout, Model 110, what makes Hull #6579 rare is that it was the only Model 110 built at GarWood’s Marysville Michigan factory that year. Originally powered by a Chrysler Ace 6-78, this boat was delivered to Saranac Lake, Ny June of 1940, eventually she found her way to Lake Tahoe, where her current owners with the help of us at Sierra Boat transplanted a small block Chevy v8 to help the boat perform better at Lake Tahoe’s 6250 ft altitude.
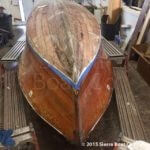
More than 25 years prior when Roki II was known as Le Canot de mare she had a layer of fiberglass applied to her hull to make for an easier launching process. When properly applied to a viable hull fiberglass can make for a sound bottom that can last for years. In this case the glass bottom kept the boat afloat for 25 years. Wood rot is tricky though and can be hiding, lying dormant for years waiting to slowly creep out. Wood rot is actually a living fungus that needs moisture to become active, somewhere in the 28-30% saturation range. The dry climate and clean water of Lake Tahoe make it ideal for the preservation of wooden boats, however in this case the outer layer of glass combined with some unforeseen rot, created the right environment for the rot to become active and take over.
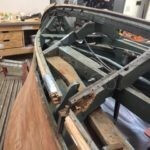
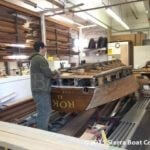
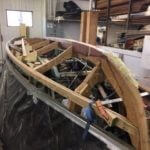
After the layer of glass was peeled off, the next step was to remove the bottom planks, this was done by carefully sawing the double planked bottom in between the frames. As the bottom came off it was unfortunately realized that the rot was extensive throughout the white oak framework of her hull. Brian Richards our Refinish Supervisor, with the help of Scottie Naylor have been tackling the labor intensive process of removing and replicating each individual bottom frame along with the ribs, and chines as well as the keel, gripe and stem. This frame work will be constructed mostly of white oak, with pine floor supports and a piece of amaranth for the gripe. All of the newly installed wood will be treated with Smith Company Penetrating Epoxy, this product gets deep into the pores of the wood and helps to prevent any future rot from occurring.
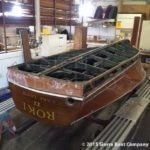
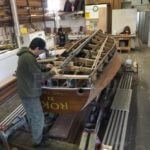
The process of replacing the framework is slow and deliberate, it’s completed by removing each damaged frame in as good of condition as possible and using that frame as a template to create an exact replica. There is eleven frames on both the port and starboard sides of the bottom, each of these frames are connected to the side frames with white oak knees and fastened with silicon bronze thru-bolts, and secured by a nut with a lock washer. The bottom frames are then joined together across the keel with a frame tie, these frame ties join both of the single frames across either side of the keel.
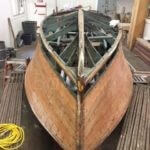
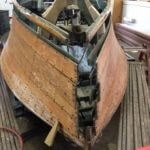
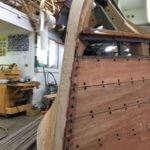
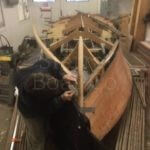
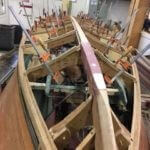
As the work approaches the bow of the boat it gets more complicated, the rot wasn’t only attacking the bottom frames but had made its way up through the stem. In order to get the stem out it is required that we remove the bungs and fasteners from the hull sides from the stem back to the second frame, including all of the batten fasteners, this gives Brian enough room for the final removal. Once the white oak stem has been replicated with the rabbet cut in, it is the first piece of wood to be reinstalled. From there we can attack multiple time consuming projects such as the replacing of the chines, and the keel/gripe. The chines are fabricated out of solid 2”x2” white oak that has been joined together with a scarf joint, the joint is bonded with 3m 5200 sealant and it is backed with a thru-bolted butt block, all in the same fashion that it left the GarWood factory with.
After the chines are extended by the scarf joint, the pieces are then steamed so that they can be bent around the compound curve of the vee hull. Once the 2”x2” rough cut chine is bolted in place, it is given a few days to let the moisture from the steam dissipate. While the chines dry Brian and Scottie work on getting the rough lumber for the keel and gripe in place. The keel and gripe will be scarfed together with the same process as the chine, being bonded with 3m 5200 as well as fasting with thru-bolts, once the oversized keel and gripe are joined together they can be bolted in place.
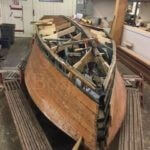
Now that most of the frame work is installed in the boat Brian and Scottie can work on cutting the rabbets into the chines and keel. Scottie starts on the chines by laying out and marking the new with old. These new chines will be marked identical so he is able to make rough out the guide lines for the shape of the rabbet, which he cut by hand with a sharp chisel, followed by a final clean up with a rabbet plane. While Scottie works on the chines Brian will be working on the rabbet cuts in the keel. Brian takes a more modern approach to this cut using a router, with a guided fence. White oak is some tough wood so Brian cuts the depth of the rabbet in steps, an attempt to make the full cut in one shot would make it difficult to keep the router in control.
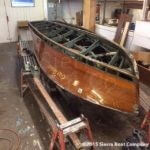
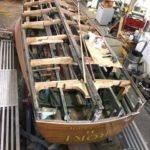
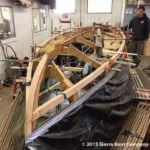
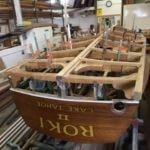
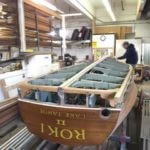
Both the chines and keel are installed slightly oversized, this extra wood makes it so that we don’t come up short while finishing the bottom planking, the extra height will be sanded fair once the new bottom is bedded and fastened. At this point with all of the new frames installed we take advantage of the bottom being open and use this opportunity to get some coats of bilge paint on the newly installed wood, as well as the inside of the inner planking. For this bilge color we use a Repcolite Enamel that we had color matched from GarWood’s original gray color. Once all of the painting is complete we will begin on the installation.
After all the bottom frames are in we use them as a jig to bend up the ribs. The floating ribs are made from ½”x 1 ¼” white oak, we first steam these pieces, then use the frames in the boat paired with some 3/8” shims and clamps to over bend them so after the spring back we are left with the proper curve. The eight frames of the boat each get 3 floating ribs bent to their shape.
For the ¼” Okoume plywood inner planking we start off my ripping down some stock ¼” marine plywood sheets on the table saw into uniform 10”x48” pieces. These pieces will then have a 45deg angle cut into them on one side. This pre-cut in the wood will but up against the keel, the opposite side will each be marked and cut individually for their custom sizes. When this wood is laid for its final install it will be bedded with Polysulfide caulking from Boat-Life, as it is both stapled and screwed with #6x½” silicon-bronze fasteners.
Thanks for checking in with us and look out for our next article in which we will go more in-depth with the process of installation of our bladder bottom!